There are so many features within Canva it can be a little overwhelming. Here are our five top tips that you might not know about that will save you time when creating your next design.

1. Easily connect shapes using Quick Flow
Canva’s Quick Flow feature helps you align, group and arrange elements effortlessly. Dragged an image but need perfect alignment? Or maybe you’re stacking text with icons? Quick Flow ensures everything is aligned evenly, without manual fiddling. But did you know that you can also use it to connect shapes and quickly create Flow Charts? Here’s how:
- Click on a shape, right click, and then select Enable Quick Flow (if the menu says ‘Disable Quick Flow’ then you already have it enabled)
- You can then click on the arrows that appear around your shape to attach it to other shapes
You can also select multiple elements and use the Group feature to keep everything together.
2. Have different sized documents within one file
One of Canva’s hidden gems is the ability to add multiple pages to a single design. It’s perfect for creating presentations, flyers, or a carousel for Instagram. But did you know that you can also create different sized documents within the same file?
- Click the Add Page button below your current design
- Choose a different page type by clicking on it from the list
This allows you to design each page as part of a bigger picture while keeping everything in one place, such as creating a whole social media pack for a marketing campaign.
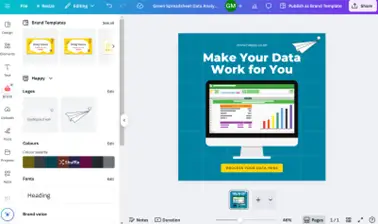
3. Apply your brand kit to your design in seconds
If you’re creating a design for a business or a project, Canva’s Brand Kit feature is your best friend. Brand Kit allows you to store your fonts, colours and logos, so you don’t have to manually choose them each time. Here’s how:
- Navigate to Brand Kit from the Canva Menu
- Upload your brand assets (such as logos), choose your primary and secondary colours, and select your fonts
- When in a design, click on Brand in the navigation panel on the left, then Shuffle to update the design using your branding instantly
You can also quickly add your logo to the design through this Brand navigation panel.
4. Resize an element while keeping proportions
Have you ever tried resizing an element only to distort it? Canva makes resizing elements easy while ensuring its proportions are maintained. This is perfect for resizing photos, logos or even text. Here’s how:
- Hold down the ALT key and you will be able to resize from all four corners in proportion
- Canva will also display all the pixel sizes of elements and spacing in your design, so you can keep these consistent.
Need to resize a whole design? Upgrade to Canva Pro and use the Magic Resize tool to adjust your design for different formats like Instagram, Facebook or Pinterest posts.
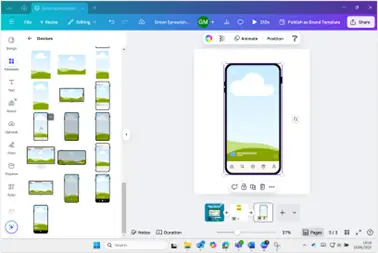
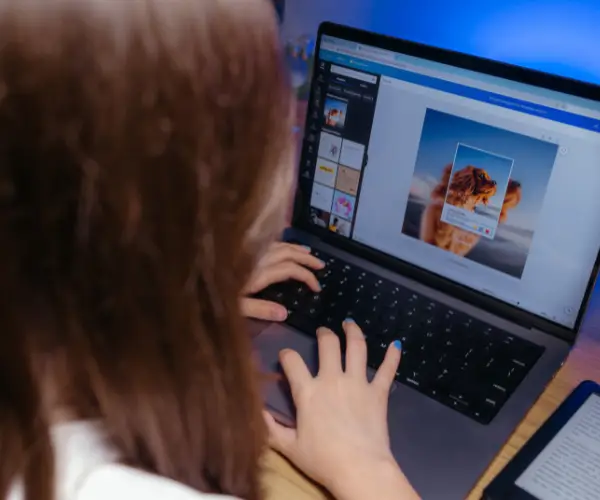
5. Use Canva Frames to create eye-catching mock ups
If you want to create a quick mockup, then you can use Canva frames. These are drag-and-drop placeholders for your images, which means you can drag and drop your images into them and your image will stick to the position. Here’s how:
- Click on Elements on the navigation panel on the left, scroll down to Frames, then click on ‘see all’
- This section will expand – then scroll down to Devices, and click ‘see all’ again
- Click on the device you want to use to insert it into your design
- Drop an image inside the placeholder, and Canva will automatically crop it to fit
You can use either the stock images (under Elements) or images from your uploads folder. You can also double click the image inside the frame to readjust its position.
Using Frames like mobile phones or laptops for mock ups will allow you to showcase your app or website in action.
Canva makes it simple to turn your ideas into stunning designs, no matter your skill level. By using Quick Flow, adding pages, applying your brand kit, resizing with precision and utilising frames, you can create professional-looking designs in no time.
Want to learn more top tips? Happy has three Canva training courses available: Canva, a one-day workshop, and Canva Whiteboard, a two-hour session focusing on the Whiteboard feature, and Canva Infographics, a 90-minute session focusing on creating professional infographics.
For more personalised guidance, contact our friendly team for a tailored workshop or one-to-one session to improve your Canva design skills.